Font APEX is preferred most of the time but sometimes there are icons I really want to use which are not (yet) included. For these cases I want to load the latest Font Awesome library.
It is possible to load Font Awesome instead of Font APEX by opening Shared Components -> Themes -> Universal Theme, and setting Custom Library File URLs to the location of the library (wherever you have loaded it). However, this replaces the Font APEX font completely so you can’t use both at the same time using this method.
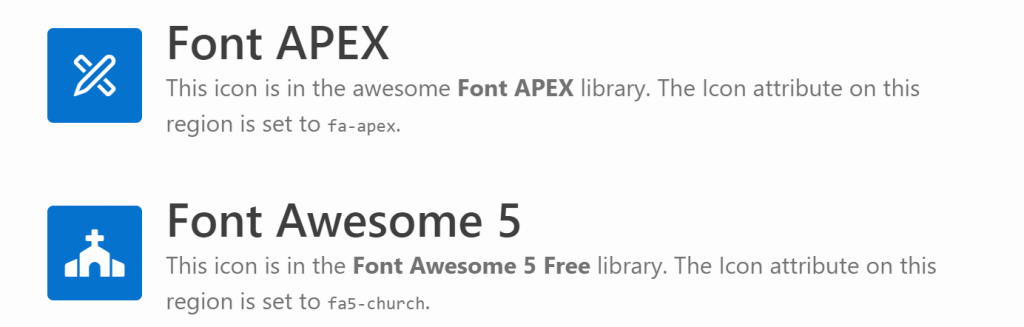
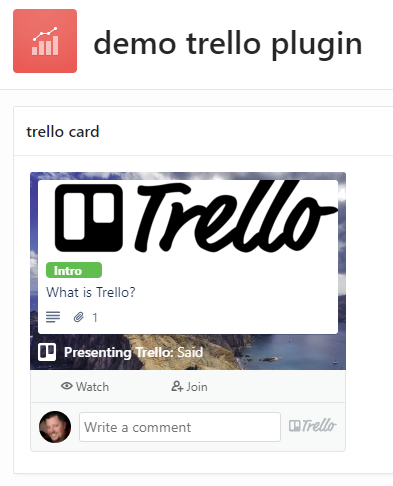
These regions are shown in the same page; the first region uses a Font APEX icon, the second uses a Font Awesome 5 Free icon.
In order to use both at the same time, I’ve downloaded the latest free version of Font Awesome 5 from here (fontawesome.com), taken a copy of the file css/all.css and edited it to replace all occurrences of “.fa” with “.fa5” (if you use CSS precompiler you can do this by editing the appropriate variables file, e.g. _variables.less). This is necessary because the “fa” class prefix would conflict with Font APEX. I named my custom file “fa5.css” and created a minified version as well.
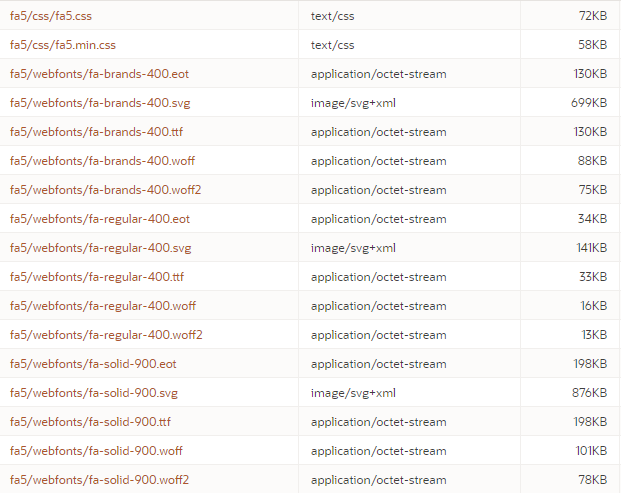
On my web server I created the folder /fa5 under my public html folder, and copied the following files / folders into it:
/fa5/css/fa5.css
/fa5/css/fa5.min.css
/fa5/webfonts/* (all contents)
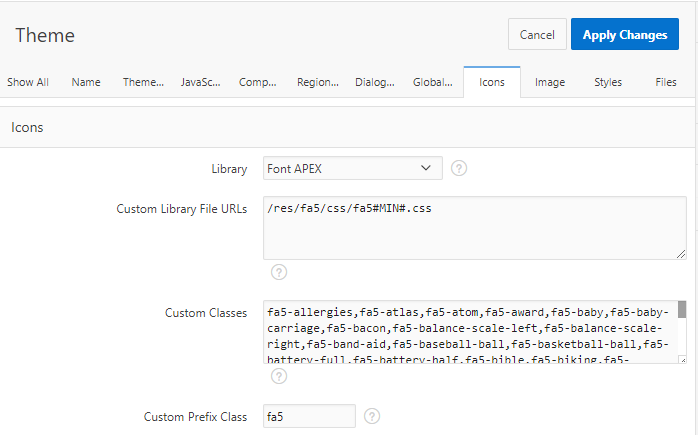
In my APEX application, in the Universal Theme properties I set:
Custom Library File URLs = /fa5/css/fa5#MIN#.css
Custom Prefix Class = fa5
(optional)Custom Classes = (comma-delimited list of your favourite icons)
Theme attributes to load a custom library.
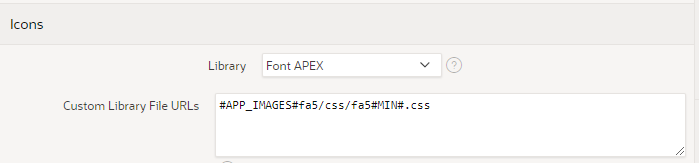
Alternatively, you could upload the library into your Static Application Files and load them from there.
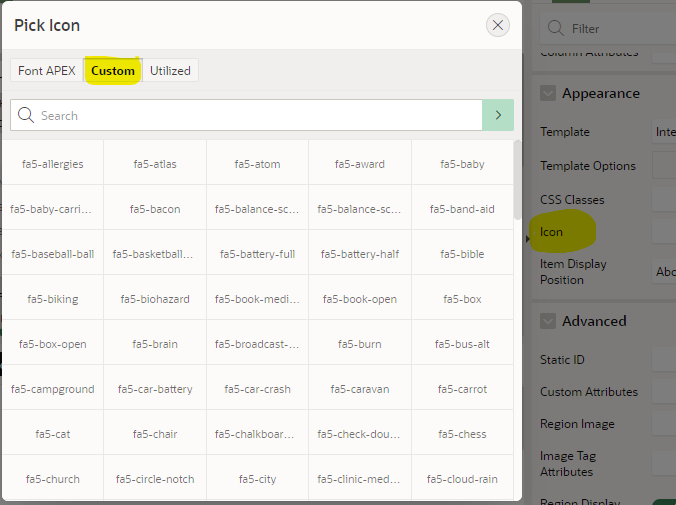
Files loaded into Static Application Files.Theme settings to load the custom library from Static Application Files. If you set the Custom Classes attribute on the theme, you get them listed for convenience in the Pick Icon / Custom list. It doesn’t show previews of the icons, however, since I don’t know how to load a custom library into the APEX builder environment itself.
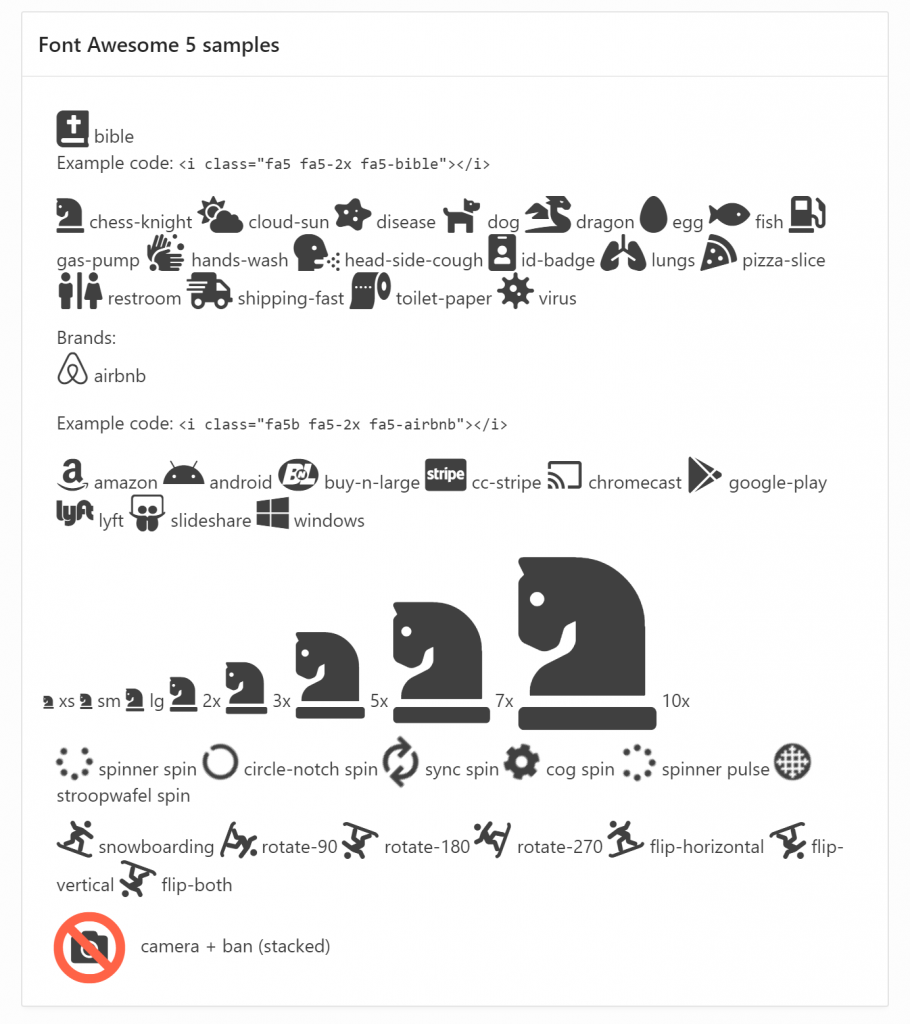
If I want my page to use an icon from Font APEX, I use the fa- icons as usual, e.g. fa-apex. Where I need an icon from Font Awesome, I have to include both the fa5 class as well as the icon class, e.g. fa5-restroom. For brand icons, of which Font Awesome has a large selection, the class is fa5b, e.g. fa5b fa5-amazon-pay. Font Awesome also includes a range of modifiers including sizes, spin, pulse, rotating, mirroring, and stacking.
The spin and pulse effects are not visible in the screenshot above. A live demo can be viewed and examined here: https://jk64.com/apex/f?p=TEST:FA5:0.
You are, of course, asking, can I stack two icons AND spin just one of them? The answer, of course, is yes:
Issue #1: Featured Hero Region Icon
When I tried to use a Font Awesome icon in a Hero region with the “Featured” style, the font failed to load. This is because the “Featured” style overrides the font-family causing it to fail to use the Font Awesome font. To fix this, on the page I added the following CSS:
In a navigation menu, APEX includes the “fa” class which controls the positioning of the icons in the menu, but it also overrides the font library and fails to load the icon from Font Awesome. To fix this, I further edited my fa5.css file (as well as the minified version) to add the following:
The Icon attribute on a region can only be used to provide a class (or list of classes) to serve as the icon for the region. To use a Stacked icon in this case is impossible as the stack must be specified using a span with nested nodes for each icon in the stack. A workaround for this is to use some jQuery to modify the html at runtime, as follows:
Set the region’s Static ID, e.g. stacked
Set the region’s Icon attribute to one of the icons in the stack (just so that there is something shown if the javascript is delayed), eg. fa5-camera
Add this to the page’s Execute When Page Loads (this example is for a Hero region:
It’s a messy kludge, and you’ll have to adapt it if you want to use it in other region templates (check what the span class is), but if this provides significant business benefit then it might be worthwhile.
Comparing Font Awesome 5 Free with Font APEX
I’ve loaded lists of all the icons in the Font Awesome 5 Free and the Font APEX libraries into a table and created a little application that allows me to compare them.
Note: these stats are not perfect because some of the icon names are slightly different between the libraries – for example, all of the “hand” icons have slightly different names between the two libraries.
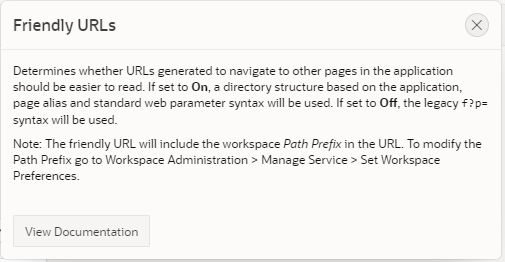
Oracle has updated apex.oracle.com to APEX 20.1 which includes among other features the new “Friendly URL” option. The legacy URL structure concatenated a string of parameters into a single “p” parameter, which works fine; but it can make it difficult to configure web server rules to match and rewrite URLs. Apart from the application ID or alias (the first part), all the parameters are optional; if all were specified the URL will be something like this (line breaks added for clarity):
In this example, the application alias is used (SAMPLE_DB_APP) and page alias (HOME) followed by the session ID etc. I’ve also specified the workspace (jk64) using the “c” query parameter.
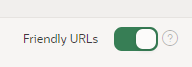
In APEX 20.1 if you edit your Application Properties, you will see the new “Friendly URLs” setting.
With this setting turned on, URLs generated throughout the application will take this form (this is not exhaustive, there are other query parameters supported as well):
When the documentation says the URLs should be “easier to read” I’m pretty sure they mean “by developers”, not end users. I suppose this means the URLs make more sense to developers of other web-based applications, because they conform better to REST URL conventions.
In its simplest form, the URL generated by APEX will include just the workspace path prefix, application, page, and session ID:
Calling APEX_PAGE.GET_URL generates the URLs correctly for the application according to whether the Friendly URL setting is on or not.
I noticed the following features of this new format:
The URL generated by APEX_PAGE.GET_URL now includes a full path (excluding the domain).
Instead of the “c” workspace query parameter, the application’s Path Prefix (which could be set to something other than the workspace name) is used (jk64 in my example). This is not the workspace name, although in most cases it usually will happen to be the same because it’s defaulted that way. This attribute is set at the workspace level, under Administration / Manage Service / Set Workspace Preferences / SQL Workshop.
If not specified, the application and page alias will be used rather than the application or page ID, which is nice.
Even if you specify the application or page alias in uppercase, APEX_PAGE.GET_URL returns them in all lowercase.
The more important attributes relevant to a user navigating the application are now further towards the start of the URL, such as page and item values, so they will be more likely to be noticed by the end user.
The “/r/” bit in the URL is just that. It’s just “r” and can’t be anything else, don’t ask me what it means. EDIT: apparently it stands for “router”…
If your users have bookmarked your application using the legacy URL format, you can still safely upgrade your application to use Friendly URLs because both are still supported. This also means that if you have some old code that generates links programmatically they should still work the same (although it is best practice to call APEX_PAGE.GET_URL for this purpose).
In case you’re wondering, it is not possible to change the URL format when calling APEX_PAGE.GET_URL, it will follow your application’s Friendly URL setting. If you call APEX_PAGE.GET_URL for another application, it will return the correct format of URL for the target application. If you call APEX_PAGE.GET_URL for an application that does not exist, it will return the URL in the legacy format.
Existing applications after upgrading, or ones you import from an older version of APEX, will still use the legacy URL syntax. New applications will use the new Friendly URLs by default – but you can revert them to the legacy URLs if you wish.
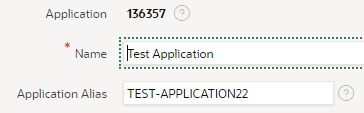
On a side note, in earlier versions when you create a new application the application alias was set to the application ID by default. In APEX 20.1, a new application will have an application alias generated from the initial application name; when I tried it, it added a number as well for some reason.
For obvious reasons, existing code that parses the URL (e.g. in javascript on the client) will probably break. This is a fairly rare thing but does happen (such as in a plugin of mine which I’ll need to fix).
At this very early stage, the legacy URL format is still fully supported – I imagine it will eventually be deprecated, but not yet.
It’s not a common requirement in my experience, but it does come up every now and then: a customer is happy with a simple Report + Form but when they open a record, they want to be able to make their changes and go to the “next” record in one button click, instead of having to go back to the report and select the other record.
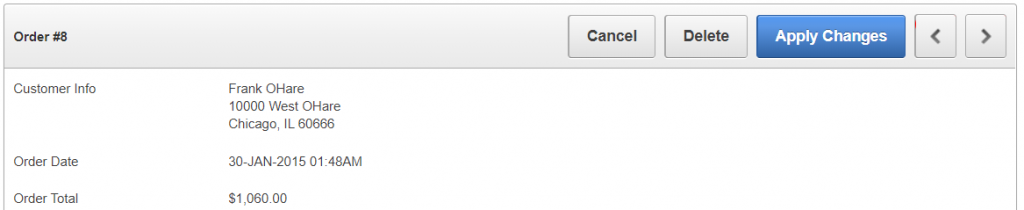
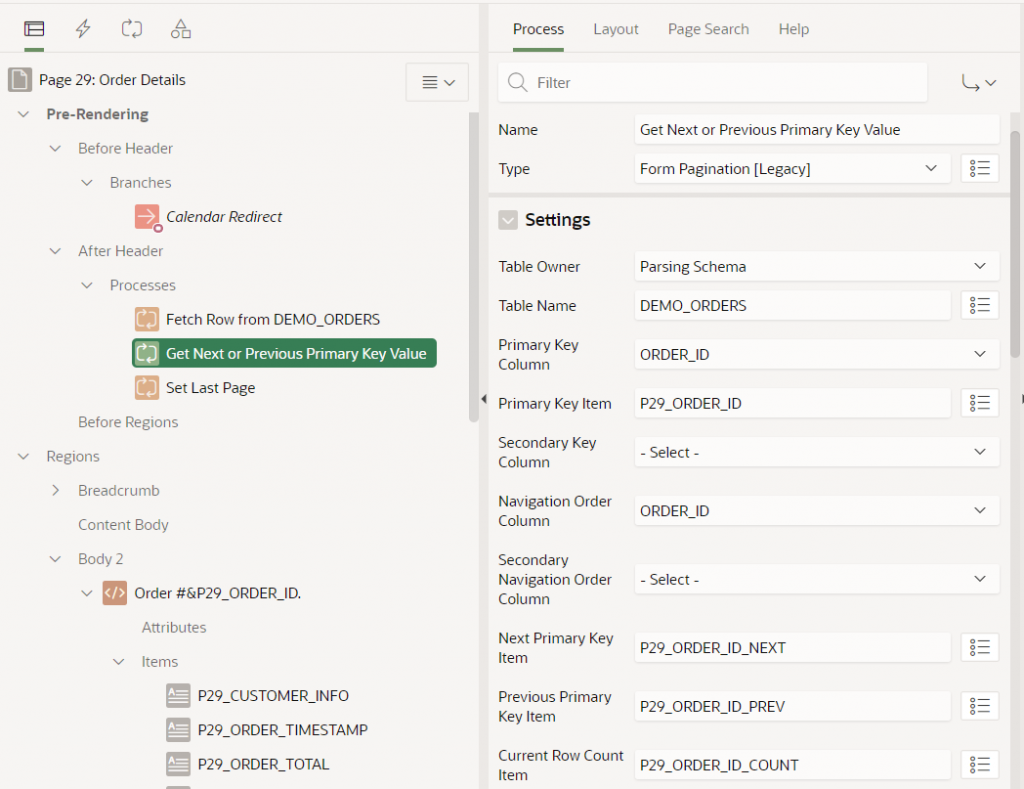
In the Sample Database Application, page 29 (Order Details) implements “Next” and “Previous” buttons which allow the user to save and open another record in one action.
These buttons are implemented using a legacy Form Pagination process. This process sets some hidden items (P29_ORDER_ID_NEXT, P29_ORDER_ID_PREV, P29_ORDER_ID_COUNT) based on a query on a specified table (DEMO_ORDERS) with a specified unique identifier (ORDER_ID) associated with a primary key item (P29_ORDER_ID). The process requires a navigation order, specified by one or two columns (ORDER_ID, in this instance) in order to know what would the “next” and “previous” records be. If there is no next or previous record is found, the buttons are hidden.
When the page is submitted, the Next and Previous buttons submit a request (GET_NEXT_ORDER_ID or GET_PREVIOUS_ORDER_ID, respectively). After the ApplyMRU process has run, one of the relevant Branches will redirect the client back to the same page (p29) and set P29_ORDER_ID to either &P29_ORDER_ID_NEXT. or &P29_ORDER_ID_PREV. which causes the page to load the relevant record.
Some things to note with this approach:
The legacy Form Pagination process is limited to a maximum 2 columns for the uniqueness constraint, and 2 columns for the navigation order.
The navigation order of records will not match any custom sort order or filtering the user might have used on the report; so after the user opens the “first record” in the report, the form will not necessarily navigate to the “next record” that they might expect.
The Next / Previous record IDs are queried when the page is initially loaded, so if anything has changed prior to the user clicking “Next” or “Previous”, it’s possible the user will inadvertently be directed to a record that is not actually “next” or “previous” to the record as it is now. In the worst case, if someone had deleted a record, the page would show “record not found”. In a perhaps less problematic case, if someone else has just inserted a new record with a unique identifier that happens to fall between the user’s previous record and the record they are navigating to, the user will effectively “skip over” the newly inserted record and might be led to believe it doesn’t exist.
For large datasets there may be a performance penalty whenever each user loads the form since the page must issue additional queries to find the IDs for the “previous smaller” and “next larger” record, as well as to get the total number of records, and the position in the overall dataset of the current record (so it can set the “count” item to something like “8 of 10”). This involves the execution of a second query (in addition to the original query which gathered the data for the record being viewed).
These are not necessarily insurmountable or showstopping issues but should be kept in mind for forms using this approach.
With the new APEX Form feature, the above approach can still be used in much the same way – the attribute settings are a little different.
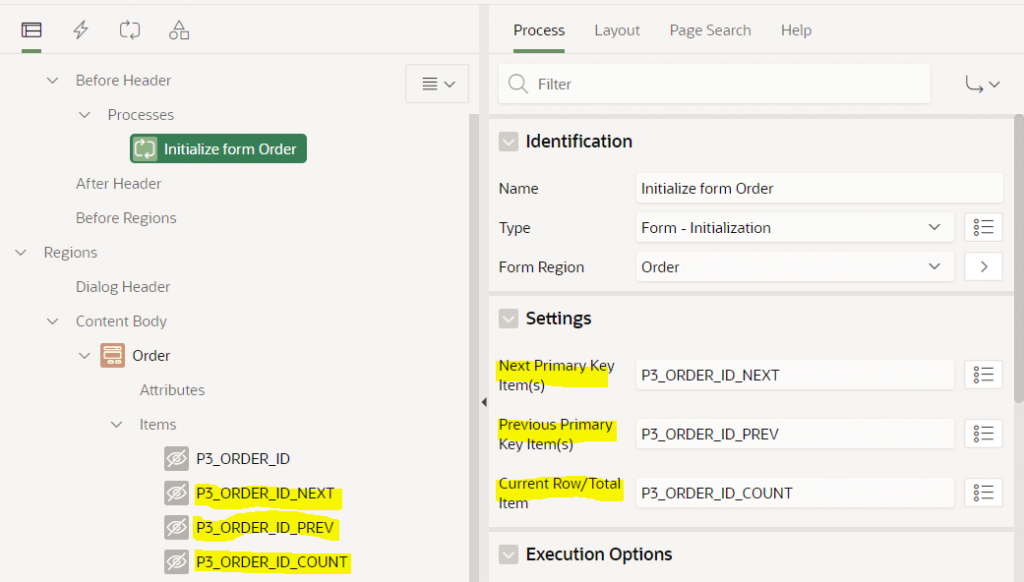
The page has a process before header of type Form – Initialization. This process has the following optional settings: Next Primary Key Item(s), Previous Primary Key Item(s), and Current Row/Total Item. To use this feature you must first create items (usually hidden) and then set these attributes to the item names.
Note that the Next / Previous Primary Key Item(s) attributes accept a comma-delimited list of items which allows them to support a compound key; I haven’t tested it but I expect this means it can support more than 2 columns.
The form will automatically populate these hidden items with the Order ID of the next and previous record, and will set the Current Row/Total Item to something like “8 of 10”. You can then use these items how you wish, e.g. as per the legacy pagination scheme, add the “Next” and “Previous” buttons, and create the navigation Branches to open the form with the relevant records.
To control the navigation order, you must set the Order By attribute on the form region. If this is not set, the navigation order is essentially unpredictable (APEX uses null as the sort order).
Same as the legacy pagination process, the form executes two queries: one to load the data for the form, and a second to gather the Next, Previous, Position and Count for the record, using SQL like this (I’ve simplified it a bit):
select i.*
from (
    select ORDER_ID, CUSTOMER_ID, ORDER_TOTAL, ...
           lead(ORDER_ID,1) over (order by ORDER_ID) as APX$NEXT_1,
           lag(ORDER_ID,1) over (order by ORDER_ID) as APX$PREV_1,
           row_number() over (order by ORDER_ID) as APX$ROWN,
           count(*) over () as APX$TOTAL
    from (
        (select /*+ qb_name(apex$inner) */
                d.ORDER_ID, d.CUSTOMER_ID, d.ORDER_TOTAL, ...
         from (select x.* from DEMO_ORDERS x) d
    )) i
) i where 1=1
and ORDER_ID=:apex$f1
It should be noted that the comments above about how concurrent record inserts and deletes by other users, and about report filters and sorting, also apply to the new form process.
In the past I built a system where it was important that the “Next” / “Previous” buttons should allow the user to navigate up and down the records exactly as shown in the report, respecting user-entered filters and sort order. The approach I took was to gather the IDs into a collection and pass this to the form when the user opened a record. I described the implementation and limitations of this approach in an older blog post which I expect still works today: Next/Previous buttons from Interactive Report results
A good question – how to load fairly largish GeoJSON documents into a Google Map in APEX?
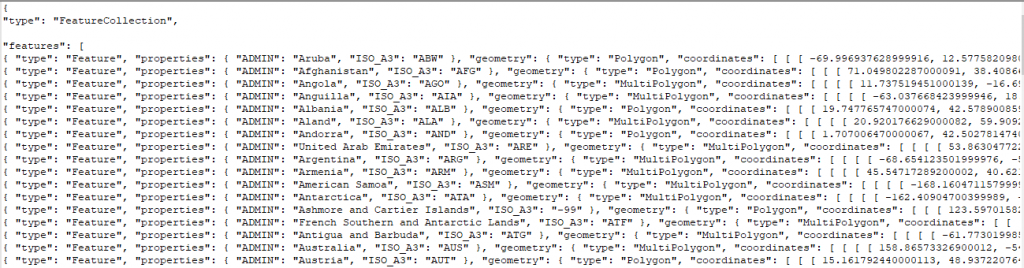
To investigate this I started by downloading a source of GeoJSON data for test purposes – one containing the borders of countries around the world: https://datahub.io/core/geo-countries. This file is 23.5MB in size and contains a JSON array of features, like this:
(the data does not appear to be very accurate for a lot of countries, but it will do just fine for my purposes)
Uploading the file to the database
To load this file into my database I copied the file to the server and ran this to load the data into a temporary table:
Alternatively, I could also have created a temporary APEX application with a File Browse item to upload the file and insert it into the import_lob_tmp table.
Parsing the JSON
I wanted to get the array of features as a table with one row per country; to get this I used json_table; after a fair bit of muddling around this is what I ended up with:
create table country_borders as
select j.*
from import_lob_tmp,
     json_table(the_clob, '$.features[*]'
         columns (
             country varchar2(255) path '$.properties.ADMIN',
             iso_a3 varchar2(255) path '$.properties.ISO_A3',
             geometry clob format json
         )) j;

alter table country_borders modify country not null;
alter table country_borders modify iso_a3 not null;
alter table country_borders modify geometry not null;
alter table country_borders add
    constraint country_border_name_uk unique (country);
alter table country_borders add
    constraint geometry_is_json check (geometry is json);
The first JSON path expression allowed me to drill down from the document root ($) to the features node; this is an array so I added [*] to get one row for each entry.
The COLUMNS list then breaks down each entry into the columns I’m interested in; each entry consists of a type attribute (which I don’t need), followed by a more interesting properties node with some attributes which are extracted using some relative JSON path expressions; followed by the geometry node with the GeoJSON fragment that represents the country borders that I wish to store “as is” in a clob column.
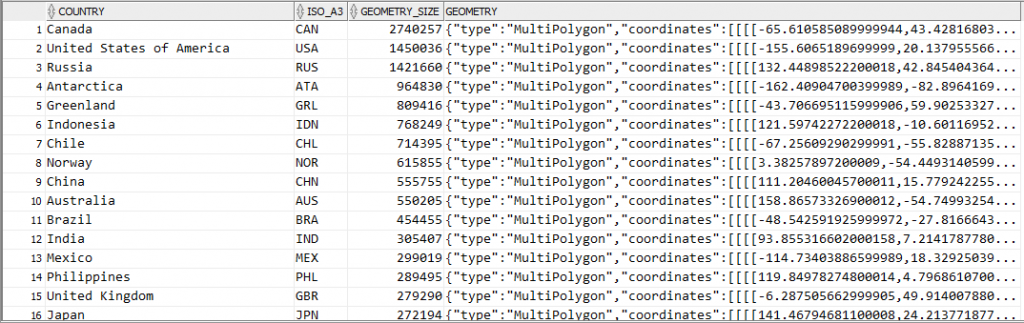
Now if I query this table it’s interesting to see which countries are likely to have the most complex coastlines (at least, as far as the data quality provided in this file will provide):
select country,
       iso_a3,
       dbms_lob.getlength(geometry) geometry_size,
       geometry
from country_borders
order by 3 desc;
It should be noted that since I’ve extracted the geometry node from each feature, the resulting data in the geometry column do not actually represent valid GeoJSON documents. However, it’s easy to construct a valid GeoJSON document by surrounding it with a suitable JSON wrapper, e.g.:
'{"type":"Feature","geometry":' + geometry + '}'
Showing the GeoJSON on a map
The next step is to load this border data onto a map for display. I recently released version 1.1 of my Report Map Google Map plugin which adds support for loading and manipulating geoJSON strings, so I started by importing region_type_plugin_com_jk64_report_google_map_r1 into my APEX application.
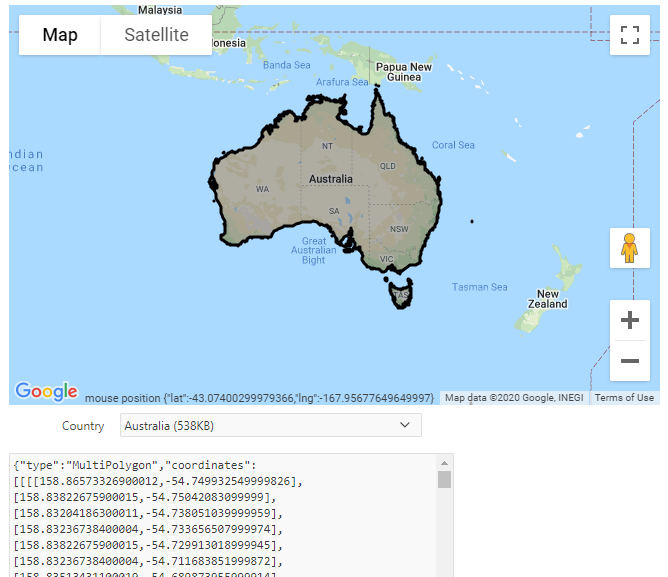
I created a page with a region using this plugin. I set the map region Static ID to testmap. On the same page I added a text item, P1_GEOJSON, to hold the GeoJSON data; and a Select List item P1_COUNTRY with the following query as its source:
select country
       || ' ('
       || ceil(dbms_lob.getlength(geometry)/1024)
       || 'KB)' as d
      ,country
from country_borders
order by country
I added a dynamic action to the Select List item on the Change event to load the geometry from the table into the map. Initially, I added the following actions:
A Set Value action that sets P1_GEOJSON to the result of the query: select geometry from country_borders where country = :P1_COUNTRY
An Execute JavaScript action that loads the GeoJSON into the map (after first clearing any previously loaded features):
This technique works ok, but only for smallish countries where the GeoJSON of their borders is less than 4K in size. For countries with more border detail than can fit within that limit, the Set Value action query only loads part of the JSON data, resulting in an invalid JSON string – and so the map failed to load it. The Set Value action was therefore unsuitable for my purpose.
To load the entire CLOB data I used another plugin. There are a few CLOB load plugins available for APEX – search the Plugins list at apex.world for “clob”. I chose APEX CLOB Load 2 by Ronny Weiß.
I imported the plugin dynamic_action_plugin_apex_clob_load_2 into my application, then replaced the Set Value action with the action APEX CLOB Load 2 [Plug-In]. I set SQL Source to:
select /* Element type dom - for jQuery selector e.g. body or #region-id,
          item - for item name e.g. P1_MY_ITEM */
       'item' as element_type,
       /* jQuery selector or item name */
       'P1_GEOJSON' as element_selector,
       geometry as clob_value
from country_borders
where country = :P1_COUNTRY
I set Items to Submit = P1_COUNTRY and Sanitise HTML = No. I also set Selection Type = Region and select the map region so that the spinner is shown while the data is loaded.
Result
The plugin works well. The border for any country can be loaded (for some countries, it takes a few extra seconds to load) and drawn on the map:
If you would like to see this in action, you may play with it here: https://jk64.dev/apex/f?p=JK64_REPORT_MAP:GEOJSON
There is a great deal you can build in APEX without even thinking about using a plugin. The development platform has an excellent range of built-in functionality and components so that almost all user requirements can be covered using standard APEX features. Restricting yourself to only the built-in, declarative features (i.e. “low code”) of the tool will result in applications that are easy to maintain and resistant to regression issues when upgrading. However, there will come a time when some custom code is required, whether some special data processing (using PL/SQL), some special user interface styling (using CSS), or some special user interface behaviour (using JavaScript or jQuery).
After you have built an application with (a minimum of) custom code like this, it sometimes happens that the same user requirement crops up again elsewhere; whether on another page, another application, or another workspace. The first time you encounter this you will probably just do a “copy and paste” to replicate the custom code. When you encounter the requirement a third time, you should be asking yourself, “how can I make this code more re-usable” – because chances are one day you’ll need to fix a bug or make an enhancement to that code, and you’ll want it to be easy to deploy the change wherever it has been used. This is where an APEX plugin could be a suitable solution.
This post is mostly based on a talk given in October 2019 at the Australian Oracle User Group conference in Perth, Western Australia.
What is an APEX Plugin?
An APEX Plugin is a Shared Component that can be used in any number of pages in the application. When used, it generates a Region, an Item, a Process, or a Dynamic Action; or, it may implement an Authentication or Authorization Scheme. It is a self-contained set of attributes, code, and (optionally) file attachments. It may be copied to another application, or exported as a SQL script for importing into an application in another workspace or another APEX instance.
Where can I get started?
In my opinion, a great way to get started learning about plugins is to examine a lot of plugins that others have created. The two sources I would recommend you look at are:
Install the Sample Database Application – go into its Shared Components -> Plugins, and look at each of the plugins therein. Look through each attribute and examine the code; read the help for each attribute as well. Look at how the plugins are used in the application.
Browse the plugins at apex.world, and install a few that seem interesting to you.
When looking at these plugins, be aware that many of them have been created by people just like you and me – at differing levels of experience and skill; so they may or may not perfectly reflect “best practice”. This especially goes for the plugins published by yours truly :). In addition, depending on how long ago a plugin was written, it might be more complex than it needs to be, as it might not take advantage of recent enhancements to the APEX plugin API.
Plugin Concepts
Plugin Types
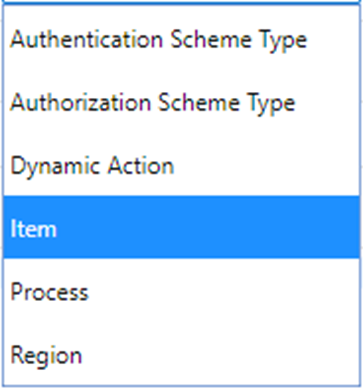
Plugin Type – a plugin may be for a page Region, a page Item, a page Process or a Dynamic Action; or it may implement an Authentication Scheme or an Authorization Scheme. For example, if you create or install an Item Plugin, it will appear in the list of item types available for adding to a page.
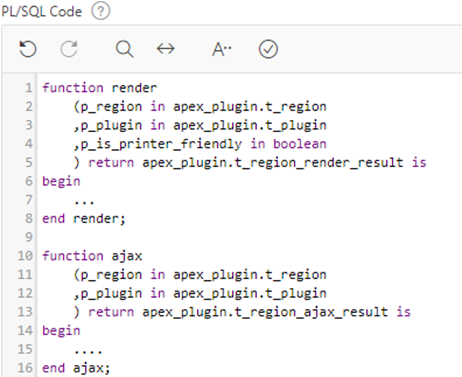
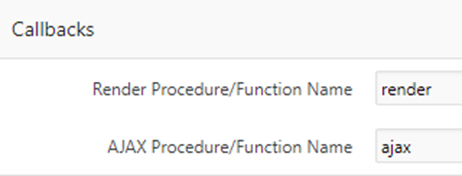
PL/SQL and Callbacks – if needed, you can embed PL/SQL code that APEX will call when rendering the plugin component or for other events such as handling an AJAX callback or validating an item.
The Callbacks attributes allow you to specify the name of the function for APEX to call; these might be functions that you define within the PL/SQL Code section, or they can call functions in a database package you have defined.
The functions you define must have the exact parameters and return types as documented in the help for each Callback attribute.
Standard & Custom Attributes – some plugin types have Standard Attributes (defined by APEX), and can have additional Custom Attributes (defined by you). For example, a Region plugin has standard attributes that define whether it supports a Data Source or supports the CSS Classes attribute.
If needed you can define up to 15 custom Application attributes. These would be set by the developer when they first install the plugin into their application, and their values apply to all usages of the plugin across their application.
You can also define up to 25 custom Component attributes, which are set on each usage of the plugin separately. The developer will find these in the Attributes node.
Each Custom attribute can be any of a long list of different types, including Text, TextArea, Yes/No, Number, Checkboxes, Select list, Item name, Icon, PL/SQL Code, JavaScript Code, and many others. You can provide a default value for each attribute if needed.
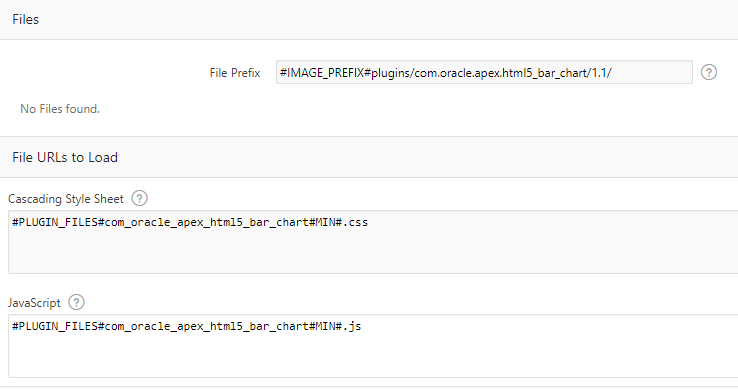
Files, JS and CSS – you can attach any number of resources including JavaScript, CSS scripts, images, or anything else that are required by your plugin. To load JavaScript or CSS files on pages where your plugin is used, you can simply enter them in the File URLs to Load, or call the APEX API routines in your render PL/SQL code (e.g. APEX_JAVASCRIPT.add_library or APEX_CSS.add_file).
When you export the plugin, all the attached resources will be included in the SQL script.
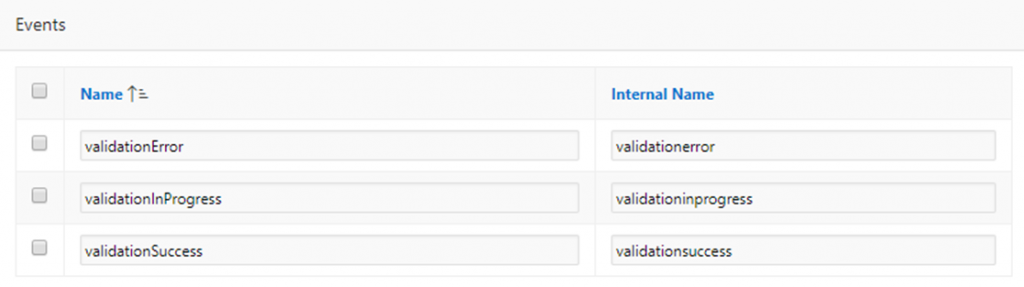
Plugin Events – if your plugin needs to allow your developers to add Dynamic Actions that respond to events raised by your plugin (e.g. to respond to user actions) you can define any number of custom Events here.
Walkthroughs
I’ve written these instructions to get you started creating plugins. They assume you are already reasonably familiar with building simple applications in APEX, and are comfortable editing PL/SQL.
A nice addition to APEX release 18.1 is the Application Settings feature. This allows the developer to define one or more configuration values that are relevant to a particular application. In a recent project this feature came in useful.
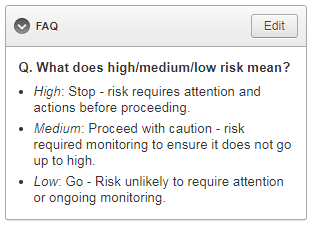
I had built a simple questionnaire/calculator application for a client and they wanted a small “FAQ” box on the left-hand side of the page:
I could have built this as an ordinary HTML region, but the Admin users needed to be able to modify the content later, so the content needed to be stored somewhere. I didn’t feel the users’ requirement was mature enough to design another table to store the boilerplate (not yet, at least), so I thought I’d give the Application Settings feature a go.
An Application Setting is a single value that can be set in Component Settings, and retrieved and modified at runtime via the supplied PL/SQL API (APEX_APP_SETTINGS). The feature is most useful for “configuration”-type data relevant to the application’s user interface. In the past I would have created a special table to store this sort of thing – and in some cases I think I still would – but in some cases using Application Settings may result in a simpler design for your applications.
I went to Shared Components, Application Settings and created a new Setting called “FAQ_BOILERPLATE“. Each Application Setting can have the following attributes configured:
Name – although this can be almost anything, I suggest using a naming standard similar to how you name tables and columns, to reduce ambiguity if you need to refer to the setting in your PL/SQL.
Value – at first, you would set this to the initial value; if it is changed, it is updated here. Note that the setting can only have one value at any time, and the value is global for all sessions. The value is limited to 4,000 bytes.
Value Required – if needed you can make the setting mandatory. In my case, I left this set to “No”.
Valid Values – if needed you can specify a comma-delimited list of valid values that APEX will validate against. In my case, I left this blank.
On Upgrade Keep Value – if you deploy the application from Dev to Prod, set this to Yes so that if a user has changed the setting your deployment won’t clobber their changes. On the other hand, set this to No if you want the value reset to the default when the application is deployed. In my case, I set this to Yes.
Build Option – if needed you can associate the setting with a particular build option. If the build option is disabled, an exception will be raised at runtime if the application setting is accessed.
On the page where I wanted to show the content, I added the following:
A Static Content region titled “FAQ”.
A hidden item in the region named “P10_FAQ_BOILERPLATE“.
A Before Header PL/SQL process.
The Text content for the static content region is:
Note that the raw value from the application setting is trusted as it may include some embedded HTML; you would need to ensure that only “safe” HTML is stored in the setting.
I later rejected this design because I wanted to hide the region if the FAQ_BOILERPLATE setting was blank.
I put a Server-side Condition on the FAQ region when “Item is NOT NULL” referring to the “P10_FAQ_BOILERPLATE” item.
Editing an Application Setting
The Edit button is assigned the Authorization Scheme “Admin” so that admin users can edit the FAQ. It redirects to another very simple page with the following components:
A Rich Text Editor item P50_FAQ_BOILERPLATE, along with Cancel and Save buttons.
An After Header PL/SQL process “get value” (code below).
An On Processing PL/SQL process “save value” when the Save button is clicked (code below).
The more APEX-savvy of you may have noticed that this design means that if an Admin user clears out the setting (setting it to NULL), since it has the Server-side Condition on it, the FAQ region will disappear from the page (by design). This also includes the Edit button which would no longer be accessible. In the event this happens, I added another button labelled “Edit FAQ” to the Admin page so they can set it again later if they want.
This was a very simple feature that took less than an hour to build, and was suitable for the purpose. Later, if they find it becomes a bit unwieldy (e.g. if they add many more questions and answers, and need to standardise the layout and formatting) I might replace it with a more complex design – but for now this will do just fine.
Otherwise reported as “WWV_FLOW_FORM_REGION.NO_PRIMARY_KEY_ITEM” or merely “Internal error”, this bug caused me to waste hours of investigation, twice, because a simple Google search was not returning any results. This post is merely to remedy that situation.
On an APEX 19.1 page with a new Form region combined with an Interactive Grid region, when the user makes a change to a record and Submits the page, they get this error.
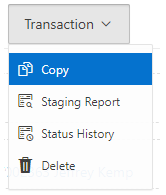
In the past when I’ve needed to add half a dozen or more buttons to a page, I’ve sometimes encased them in a Collapsible region so that the user can slide them out of the way instead of clogging up the screen. Recently however I’ve started (sparingly) using a Menu Popup, as per this tutorial. The issue I have with this method, however, is that the menu items are defined in a shared component (a List) which means it’s not defined on a per-page basis.
Some of the actions simply need to do a Submit on the page, which is simple enough: set the URL Target to something like:
In other cases, the action needs to do something more specific to the page, e.g. show a region:
apex.theme.openRegion("popupQuestion")
Or the action might need to navigate to another page, passing parameters based on specific items on the page. This means the list, defined in Shared Components, now has hardcoded elements that are only useful for that one page; more to the point, they are defined outside of the page – I’d rather that everything specific to a page is defined within that page’s definition.
The approach I’m using now is to use a custom trigger. Each list item has its URL Target set to something like:
The third parameter is set to a unique code that the page can use to identify which menu option was chosen. This parameter will be passed to this.data in the custom trigger’s event handler.
On the page, I have a Dynamic Action with the following attributes:
Event: Custom
Custom Event: menuAction
Selection Type: JavaScript Expression
JavaScript Expression: document
True Action: Execute JavaScript Code, e.g.:
switch(this.data) {
  case 'OPEN_POPUP':
    apex.theme.openRegion("popupQuestion");
    break;

  default:
    apex.submit({request:this.data,showWait:true});
}
Note that to do a simple Submit on the page, all I need to do is set the request on the third parameter of the menu item’s URL. If I want to do something slightly different for a particular request, I can put an extra “case” in the JavaScript code to handle it.
The benefit of this approach is that this trigger becomes the jumping-off point for all such menu actions for this page. In theory I could re-use the same List on multiple pages (if the items in the list are generic enough) but have different behaviour occur for each menu item specific to each page. The only challenge with this approach might be if you needed some conditions on each menu item, e.g. so they are shown or hidden in specific circumstances. If the condition for a menu item references a particular page item the List will no longer be generic and re-usable. For this reason, I usually still use a separate List for each menu for each page.
Perhaps in a future release of APEX we will gain the ability to define a List on a Page instead of in Shared Components. In the meantime, if you are interested in all the details on this method (including a solution for implementing a redirect to another page, or to open a modal page), refer to this tip.
EDIT 22/8/2019:Thanks to Robert Gerstein who noticed an issue with this solution when using Internet Explorer. A workaround for this is to not call apex.event.trigger directly in the URL on the list item, but to call a function instead (refer to comments below).
An item in the Universal Theme using the Optional – Floating template looks like this:
An item using the Required – Floating template looks like this:
In addition, if the item is required we would most probably set the Value Required attribute to Yes. What if the item is sometimes required but not always? How do we create a Conditionally Required field?
Firstly, we would make sure there is a Validation on the field that checks that the value is provided if required. This way, regardless of what the form may or may not send to the database, it is validated appropriately.
Secondly, to indicate to the user that the item is required or optional, based on the value of another item, we can use a Dynamic Action that sets the required item property (this triggers the client-side validation) and adds or removes the is-required class from the item’s container (this shows the little red “required” indicator on the page).
For example, let’s say that whether item P1_COST_CENTRE is required or not is dependent on whether a hidden item, P1_COST_CENTRE_REQUIRED, has the value 'Y'.
Create a Dynamic Action
Event: Change
Selection Type: Item(s)
Item(s): P1_COST_CENTRE_REQUIRED
Client-side Condition Type: Item = Value
Item: P1_COST_CENTRE_REQUIRED
Value: Y
Create a True Action: Execute JavaScript Code
var item = $("#P1_COST_CENTRE");
item.prop("required",true);
item.closest(".t-Form-fieldContainer").addClass("is-required");
Create a False Action: Execute JavaScript Code
var item = $("#P1_COST_CENTRE");
item.prop("required",false);
item.closest(".t-Form-fieldContainer").removeClass("is-required");
The above code works for all item templates (“Optional”, “Optional – Above”, “Optional – Floating”, etc.) in the Universal Theme; I’ve tested this on APEX 18.2 and 19.1.
Note: this is custom code for the Universal Theme, so it may or may not work for other themes; and might stop working in a future revision of the theme.
UPDATE 29/7/2019: I’ve created some simple Dynamic Action plugins (for APEX 18.2 and later) to implement this, if you’re interested you can download them from here:
To use these plugins, select them as an Action to take on a Dynamic Action:
EDIT 29/7/2019: modified to use a better method to find the container div.
Older Themes
In other themes, the way that a required field is rendered is different. For example, in Theme 26 (Productivity Applications) the label for a required item is rendered in bold, along with a red asterisk; if the item is optional, no red asterisk is rendered. The way to make an item conditionally mandatory in this theme is:
Set the item to use the Required template (so that the red asterisk is rendered).
In the Dynamic Action JavaScript, execute the following if the item should be optional:
var itemLabel = $("label[for='P1_COST_CENTRE']");
itemLabel.removeClass("uRequired");
itemLabel.addClass("uOptional");
To make the item required again:
var itemLabel = $("label[for='P1_COST_CENTRE']");
itemLabel.removeClass("uOptional");
itemLabel.addClass("uRequired");
Over the past couple of weeks I’ve been working on an overhaul of my Google Maps region for Oracle Application Express. This free, open-source plugin allows you to integrate fully-featured Google Maps into your application, with a wide range of built-in declarative features including dynamic actions, as well as more advanced API routines for running custom JavaScript with the plugin.
Route map
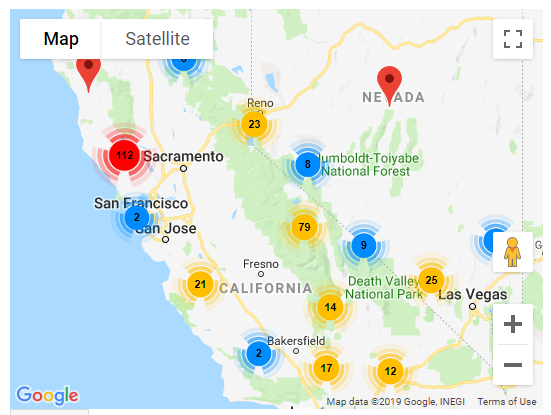
Marker Clustering
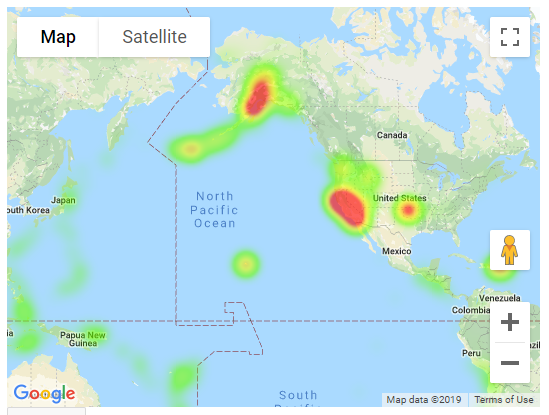
Geo Heatmap
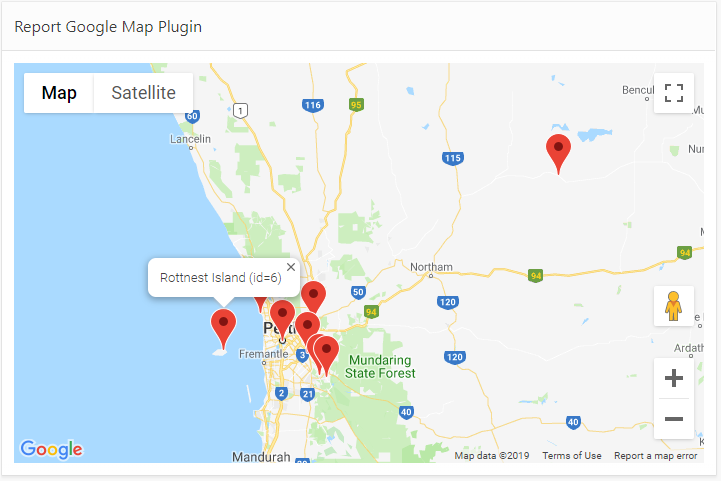
Report Map
The plugin has been updated to Oracle APEX 18.2 (as that is the version my current system is using). Unfortunately this means that people still on older versions will miss out, unless someone is willing to give me a few hours on their APEX 5.0 or 5.1 instance so I can backport the plugin.
EDIT: Release 1.0.1 includes some bugfixes and a backport for APEX 5.0, 5.1 and 18.1.
The plugin is easy to install and use. You provide a SQL Query that returns latitude, longitude, and information for the pins, and the plugin does all the work to show them on the map.
The plugin has been rewritten to use the JQuery UI Widgets interface, at the suggestion of Martin D’Souza. This makes for a cleaner integration on any APEX page, and reduces the JavaScript footprint of each instance on the page if you need two or more map regions at the same time. This represented a rather steep learning curve for me personally, but I learned a lot and I’m pleased with the result. Of course, I’m sure I’ve probably missed a few tricks that the average JavaScript coder would say was obvious.
The beta releases of the plugin (0.1 to 0.10) kept adding more and more plugin attributes until it hit the APEX limit of 25 region-level attributes. This was obviously not very scaleable for future enhancements, so in Release 1.0 I ran the scythe through all the attributes and consolidated, replaced, or removed more than half of them – while preserving almost every single feature. This means v1.0 is not backwards compatible with the beta versions; although many attributes are preserved, others (including the SQL Query itself, which is rather important) would be lost in the conversion if the plugin was merely replaced. For this reason I’ve changed the Internal ID of the plugin. This is so that customers who are currently using a beta version can safely install Release 1.0 alongside it, without affecting all the pages where they are using the plugin. They can then follow the instructions to gradually upgrade each page that uses the plugin.
All of the plugin attributes relating to integrating the plugin with page items have been removed. Instead, it is relatively straightforward to use Dynamic Actions to respond to events on the map, and an API of JavaScript functions can be called to change its behaviour. All of this is fully documented and sample code can be found in the wiki.
New features include, but are not limited to:
Marker Clustering
Geo Heatmap visualisation (this replaces the functionality previous provided in a separate plugin)
Draggable pins
Lazy Load (data is now loaded in a separate Ajax call after the page is loaded)
The plugin attributes that have been added, changed or removed are listed here.
If you haven’t used this plugin before, I encourage you to give it a go. It’s a lot of fun and the possibilities presented by the Google Maps JavaScript API are extensive. You do need a Google Maps API Key which requires a Google billing account, but it is worth the trouble. It is recommended to put a HTTP Referer restriction on your API Key so that people can’t just copy your public key and use it on their own sites. For more information refer to the Installation Instructions.
If you are already using a beta version of the plugin in your application, please review the Upgrading steps before starting. Don’t panic! It’s not quite as simple as just importing the plugin into your application, but it’s not overly complicated. If you were using any of the Page Item integration attributes, you will need to implement Dynamic Actions to achieve the same behaviour. If you had any JavaScript integrations with the plugin, you will need to update them to use the new JQuery UI Widget API calls. I am keen for everyone to update to Release 1.0 as soon as possible, so I will provide free support (via email) for anyone needing help with this.
I am very keen to hear from everyone who is using the plugin, and how it is being used – please let me know in the comments below.
If you notice a bug or have a great idea to enhance the plugin, commenting on this post is not the best place – instead, please raise an issue on GitHub.